Showing posts with label Tim Holtz. Show all posts

Wednesday, 28 January 2015

Playing along with Tim's 12 Tags of 2015 :o)

Hi there, thanks for popping by :o)

Today I am sharing my take on Tim's January tag - I really enjoyed having a go at this and I'm pleased to get it done before the end of the month!  For those who don't know, starting in 2012, Tim Holtz has given a tag tutorial each month and challenged crafters to come up with their own take on it, I wanted to join in last year, but my health being as it was I struggled to even get started.  This year I am determined to join in each and every month (fingers crossed!!)

Here is a little glimpse of Tim's 2015 January tag & if you click here you will jump over to his tutorial :o)

I won't detail all the steps for the tag here, as if you want to join in yourself you should pop over to Tim's blog and have a look there.

I also needed to do two ATCs for one of the Facebook challenge group I'm in, and the theme was 'Resolutions', I decided that this layout would be great to adapt for the ATCs too, so that is what I've done.

The starting point for the tag is texturing some Tissue Wrap, I used Tim's 'Melange' for this:


Then the base is coloured using Distress Paints and Sprays, I used a slightly different combination on mine which gave them a more tan/greeny look. Next Tim used some Alpha Parts to make up the year, unfortunately I don't have these (despite my ever growing collection of all things Tim!) so I used some chipboard letters and numbers for this.  I also don't yet have the Chit-Chat stickers for the next step, so for this I used some of my favourite wordy stamps.


And here are the words edged with Distress Inks and then stuck into place:


The chipboard letters were coloured using a copper leafing Krylon pen, and stuck down in place.  I added a brad to each of the ATCs and on the Tag, which I wanted to use as a focus for myself for the coming year, I added a little bulb embellishment with the word 'ME' on it.  A few splatters of paint and finished!


I've really loved playing along, and I'm really pleased with the way the texture and colour built up!  I can't wait to see February's tag now (just as well it's only a few days away!!)

Thanks for reading :o)
Steffi xx

Tuesday, 8 July 2014

Dipping a toe in the Water :o)

I recently got a new embossing folder which was the starting point for this project - a World Map - as my son is 18 in a couple of days and in the last year has been to both Australia and America (lucky boy!) I thought it would be appropriate to make something for him using it.  He has enjoyed his travels and plans to return to Australia as soon as he can.

So I ran a piece of card through my Big Shot, coloured it, then tore the edges and edged them in brown, then placed it onto a backing piece with some Hot of the Press paper covered in compasses.  The compasses then made me want to add a sailing ship so I searched through my ever growing pile of stamps and came across just the right set of stamps - PaperArtsy HP1202.


 My son also loves fishing, we even took him sea-fishing one birthday, so I decided to use the rest of the stamps as well.  I stamped some of them onto some cream cardstock and the others onto watercolour paper. The compass was the same size as the one on the embossing folder so I attached this with a brad at the center.  I then tried to position all the elements in a way I was happy with in order to create a card.  (You may have noticed I don't usually do cards (!) ).  This is not going to be an exception as I ended up changing my mind and painting a canvas for the back-drop!

Using a palette knife to scrape over the canvas I used some acrylic paints in blues, stones, yellow and a little touch of reddy-brown to give a mottled effect.  I then added a piece of linen to the canvas, wrapped a strip of hessian ribbon across the middle and then built up the picture on this.  I used Tim Holtz's watercolour technique on some of the stamped images using Faded Jeans and Worn Lipstick - by stamping them onto my craft sheet and then using a water brush to pick up the colour and add to the picture, and then used Brushed Corduroy to colour the torn edges which I had added on some of the images.


I stencilled through a mask with Faded Jeans to represent netting in two of the corners and as a final touch added a wooden lotto counter with the number 18.  (Another little Tim Holtz touch :o) )

I hope he likes it as much as I enjoyed creating it.

I wish to enter this into the following challenges:

A Vintage Journey - Challenge 9 Use Every Stamp in a Set - here:  http://www.vintagejourney.com/2014/06/challenge-9-use-every-stamp-in-set.html

The Artistic Stamper - By The Seaside - here:  http://www.theartisticstampercreativeteam.blogspot.co.uk/2014/07/julys-challenge-by-seaside.html

Open Minded Crafting Fun Challenges - Challenge 14 Water Water Everywhere - here:  http://open-mindedcraftingfun.blogspot.co.uk/2014/07/challenge-14-water-water-everywhere.html

4 Crafty Chicks Challenge Blog - Challenge 201 Nautical - here:  http://www.4craftychicks.blogspot.co.uk/2014/07/4-crafty-chicks-201-nautical.html

That's Crafty Challenge Blog - All At Sea - here: http://thatscraftychallenges.blogspot.co.uk/2014/06/all-at-sea-challenge.html

 and also

The Stamping Chef's - Tic Tac Toe Challenge (on Facebook) - here:  https://www.facebook.com/groups/TSCRecipes/

Thursday, 12 June 2014

A bit of texturing - Tim Holtz style!!

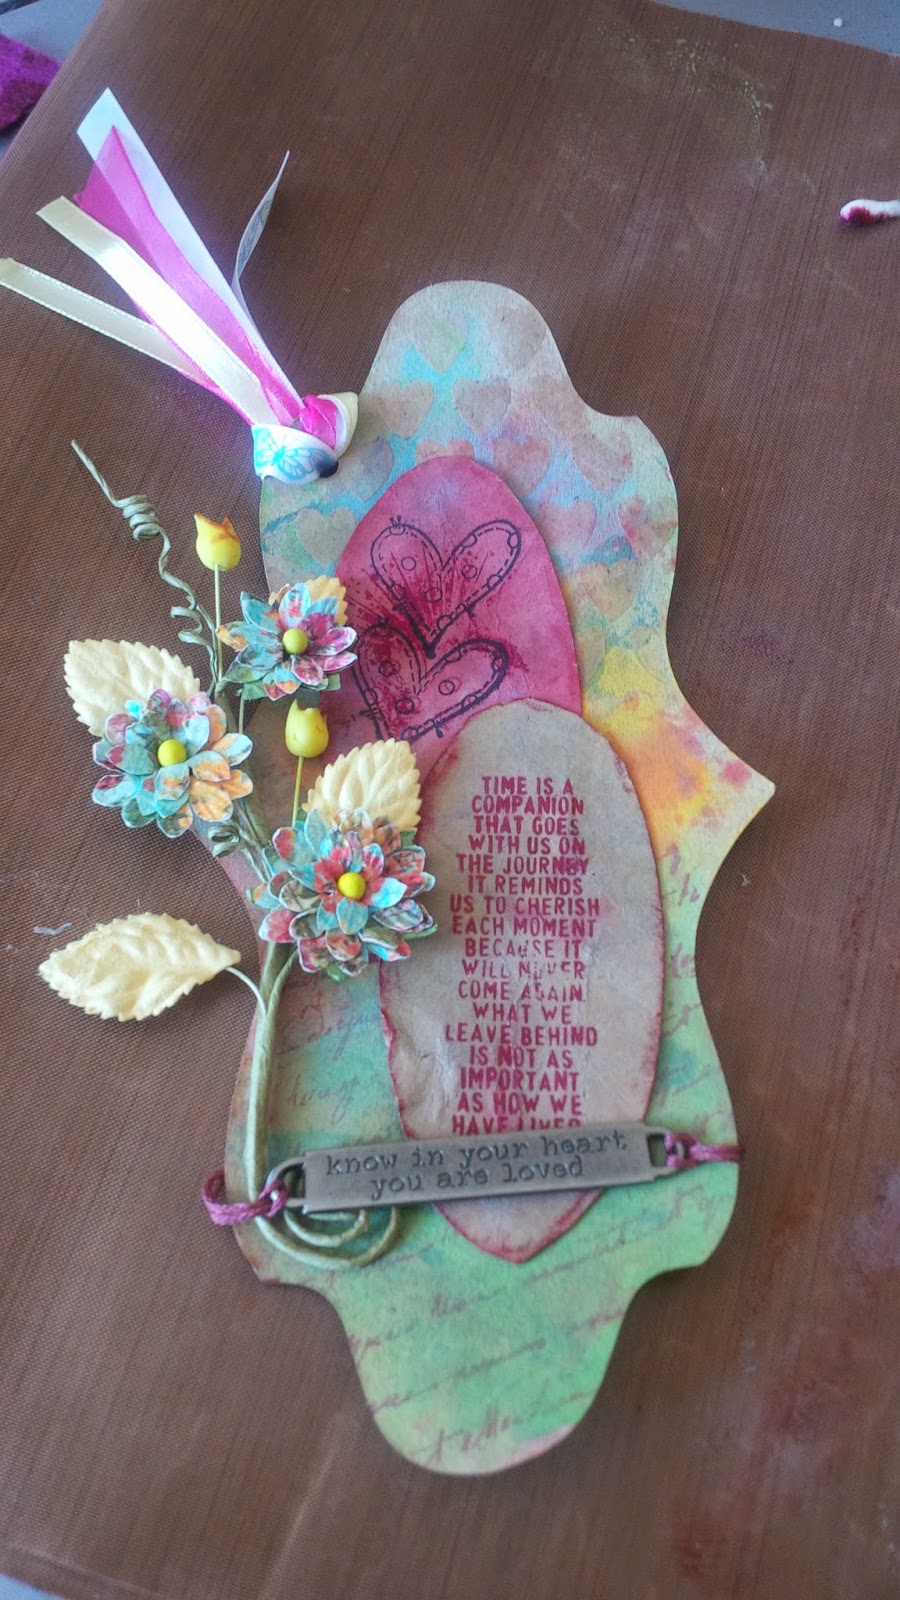
I wanted to share this tag with you as I'm practicing my tags to get a bit braver with them! As I recently got some texture pastes and I'd only used them once I thought it was about time to give them another go.  The best thing is that this fits in well with four crafty challenges: A Vintage Journey - Get Some Texture; Compendium of Curiosities 3 - Challenge 4 (CC3C); Crafty Individuals - Tag You're It!; and That's Crafty - It's All About Texture.

The first step was to use Tim's 'Layered Stencil' technique with the aforementioned texture paste - I can't share this technique with you as in line with the CC3C rules I need to refer you to Tim's third installment of the Compendium of Curiosities - this technique is on page 49.  I did use a variety of stamps to shadow stamp the background of the tag - including some Crafty Individuals ones.

This I then overlayed with two ovals on which I've used another of Tim's texture techniques - this time Crumpled Kraft Suede (page 40 in Compendium of Curiosities 2!).  I stamped these with a sentiment from my ever growing collection of Tim's stamps and a little heart.

A beautiful spray of flowers and a word band and it's all finished!


I'm really pleased with myself for venturing into the unknown!!

I would like to enter this into the following challenges:

Compendium of Challenges 3 - Challenge 4 Layered Stencil technique - here http://lindaledbetter.com/2014/06/compendium-of-curiosities-3-challenge-4.html

A Vintage Journey - Get Some Texture - here http://www.vintagejourney.com/2014/05/challenge-7-get-some-texture.html

Crafty Individuals - Tag You're It! - here http://craftyindividualsblog.blogspot.co.uk/2014/06/we-challenge-you-in-june-to-play-tag.html

and

That's Crafty - It's All About Texture - here http://thatscraftychallenges.blogspot.co.uk/2014/05/its-all-about-texture-challenge.html

Thanks for reading!
Stefanie xx


Monday, 31 March 2014

A Curious Heart - Words, Words, Words .....


This is my latest challenge entry; I've recycled an old drawer that I originally thought had been a clock housing, I bought it a while back at a bric-a-brac shop for about £2. I've created a little door for it to make it into a little cupboard.


The first thing I did was to line the inside.  I created the background paper by stamping various words (did I tell you I like text stamps?) on a beige coloured sheet of paper using crimson and chocolate coloured ink-pads.  I also stamped some little flourishes. I then blended the edges of the paper with the crimson ink and tattered rose.  The sides were lined with a co-ordinating paper.


I've wanted to try a distress, cracked paint finish for a while so, after a bit of online research,I painted the outside with a metallic copper acrylic paint, when dried I then applied a coat of pva glue and when thi was tacky but not completely dry I applied a coat of black acrylic paint.  As the glue dried the peeled effect revealed itself. I'm more than pleased with it for a first effect!


The door is a strong piece of card which I've covered with two different papers.  The front first, then adding the hardware (hinges,  handle and bookplate) before adding the back piece.  I then added a stamped tag, some wooden cogs and a leather flower embellishment to the inside of the door. I used some large round beads to create the feet.


The heart is a small polystyrene one which I've painted with a mixture of copper, red and black paints before threading a wire through it to hold it in place.


I am entering this into the following challenges:
SanDee & Amelie's Steampunk Challenges - Your Favourite Technique goes Steampunk (I've decided that the peeled paint technique I used is a new favourite!); here (www.sandee-and-amelie.blogspot.co.uk/2014/04/your-favourite-technique-goes-steampunk.html?m=1)
Rhedd's Creative Spirit monthly challenge - altered art: here (http://rheddscreativespirit.blogspot.co.uk/2014/04/april-challenge.html)
And


Sunday, 16 March 2014

Challenge Entry for A Vintage Journey and Craft All Day

There's been a great new challenge blog launch for devotees of everything shabby chic and vintage, especially if influenced by the great Tim Holtz ~ A Vintage Journey (here at http://www.vintagejourney.com/) Their first challenge is simply 'Anything Tim'

I talked a lot at the beginning of the year about wanting to enter a few challenges and this one has inspired me to take part!  I am also entering my piece into the monthly challenge at Craft All Day, where I got a few of my supplies from (http://craftallday.blogspot.com/2014/03/challenge-4-anything-goes.html ) their theme this month is Anything Goes.

One thing I've wanted to create for a long time is a shadow box - I could spend hours (hmm and probably have!) scrolling through all the delicious ones on show on Pinterest.  They just really catch my imagination so I bought a few blanks a while ago but have been waiting for the mojo to hit.  I figured the time is finally right!


I decided to use this little MDF house shaped shadow box, I really like the fact that it has different shaped sections so I could really play around with them.


So my first task was to paint it all black. I used a simple acrylic paint for this, making sure to really get into all the inside corners. I chose black as I wanted to make this one quite antiquey (is that a word!?) a bit like an old library or reading room feel to it, but there are some lovely ones which have been painted white or pale pastel colours which give a lovely shabby chic look. I will try one like this in the future sometime I'm sure.

Once the paint had dried, I spent some time picking out which papers I wanted to use at the back of each section to help give some definition. Again I went darkish papers to carry on the theme.  You might (if you look closely!) notice a few scripty papers and one with maps - two of my favourite things - words and maps!  This is also true with my choice of fabrics - my friends just have to point out either and they know I'll take the bait!


I decided that the longer section at the bottom would work best with a drawer - this though meant I had to create one.  So I measured the opening, depth, length and height and cut some stiff card to a shape that I could then score and fold to make the drawer.  I then lined it and covered the front with more papers and a little washi tape; I also attached a little handle with a couple of small brads.


The next bit was the really fun bit! Choosing which embellishments to put where, and fastening them in to place.


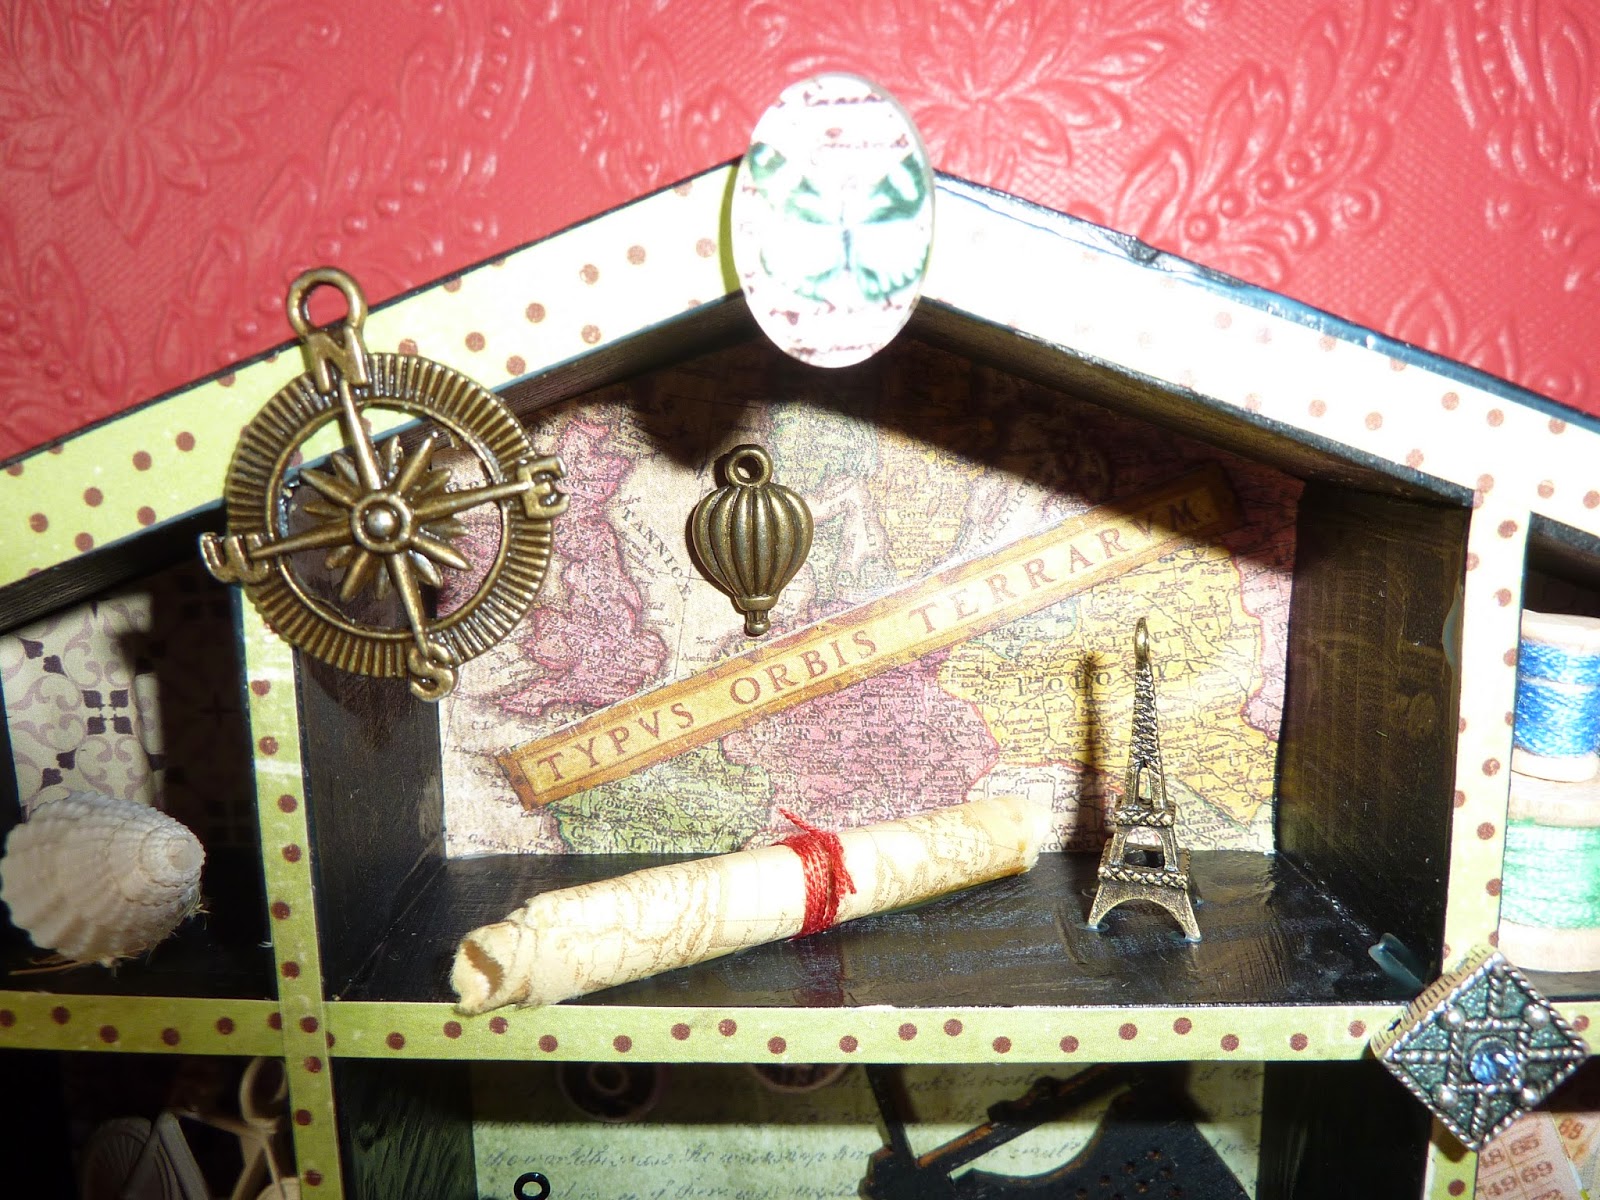
Here are a few close-ups of the individual sections.  My favourites are the 'Words' one - I would really like to have some vintage typewriter keys but haven't treated myself yet - to make these I found a copywright free downloadable image, printed it off and then cut out the letters I wanted and glued them to some little chipboard circles I had - and the 'Map Room' - I spent a long time working out what was missing after I'd placed the Eiffel Tower and the balloon and then it suddenly came to me to make a little map scroll to place in there too.


I'm really pleased with the result, and will definitely be making another.  I hope you like it too.

Thanks for reading!

Stefanie xx