Today I am sharing this little wall hanging, created on two 5" x 7" canvas boards. These are quite easy to find in various shops and are fairly inexpensive , I think these came from The Works but I have also seen them in The Range. I have also shared this over on Rhedd's Creative Spirit as the mid-month tutorial - do pop along and see the other DT pieces and maybe enter it yourself?
It took me a while to work out just what I was going to make, and as usual the finished piece is totally different than what I started with in my minds eye!!
I was going to paint the boards with acrylics, but after I decided on the main image I was going to use I thought I would like to enter this in the Dylusion's Challenge page on Facebook - each month they set a challenge with different 'rules' for April it is to use Blue, Red and Stars.
Once I'd decided what my theme was going to be I applied DecoArt Texture Sand paste through a star stencil to one of the canvas boards, and then allowed it to dry overnight. You can use a heat-gun to dry texture pastes, but sometimes this will give you a different finish effect. They can puff up, go extra smooth or crack a little - this isn't necessarily a bad thing, but it is worth being aware of. I found an interesting blog post where the blogger had compared the different results, here: http://sarathings.com/2012/06/27/tuesday-techniques-stencils-part-4-modeling-pastes/
Next, colour. As the boards are already primed with double gesso I decided to go straight in with ink sprays. I used London Blue and Black Marble. I wet the boards first and then applied the inks, letting them merge into each other, I tried to keep the darker areas to the edges by spraying the black in this area, and the blue more to the middle, although on the 'star' board a little streak of the darker colours has run through the middle - I actually like this although I was trying to avoid it.
Once the inks had dried I applied some Rub'n'buff in Gold Leaf lightly to each of the textured stars. This gave just a hint of a gleam and at first I was happy with this. As the rest of the piece evolved I decided to add a small amount of gold glitter glue on top. I crossed my fingers that I wouldn't have to start over, and when the glitter glue was dry in was relieved with the results - the two combined mediums gave a slightly muted appearance, with just a touch of glitter.
I typed out my chosen quote 'Until you are broken, you don't know what you are made of' in a Word document and played around with the size and font until I was happy, and then printed onto white card. I then stamped my image 'Survivor', one of Dyan Reaveley's newer stamps (and one I just had to have as soon as I saw it!!) using Archival Ink in black.
I coloured the stamped image with Dylusion's Cherry Pie in a water brush, this was on the body and parts of her hair, and when dry I used a couple of promarkers in oranges and yellows on the east. I fussy cut her, and cut the quote into individual words. I used Tattered Rose Distress Ink to colour the words and then edged with Brushed Corduroy - this worked fine for me, but as they were printed not stamped they do bleed a little, this will either suit your project or ruin it completely, so do check you are happy, I know some people will seal printed pieces with hairspray, to stop this bleeding, but I haven't tried this - yet!!
I then tried to work out on my layout, so I placed 'Survivor' towards one edge on the lower board, and then played around with where the words of the quote would fit. Once I was happy with this I decided that it would use some tiny gemstone chips that I've had for ages, and arrange them in lines as if they were radiating from her. I used Finnabair's 3D gel to position them on the canvas boards. (In this picture the gel is showing up as white but it does dry clear and transparent)
Whilst the crystals were drying, I decided to use some sealer on the coloured image and the quote, but (stupidly!) placed them on some cardboard packable to do this. The sealant ran over the edges and, if I hadn't realised and moved them sooner it would have totally stuck the paper to the cardboard. I usually do anything like that when the pieces being sealed are in their final position, or on some plastic or polythene that they won't stick to. I hadn't done them in situ as I hadn't wanted to seal the whole board, just the stamped and printed bits.
I have used a Crop-a-dile to punch holes into the boards and then add eyelets, and then used some chain to fasten the two together, and to create a hanger. The final touch was just to edge the boards with a little black Archival ink, and also a few glitter glue swirls alongside the crystals.
I loved this image from Dyan Reavely as soon as I saw it, with having Fibromyalgia, most days throw up their own challenges, and this reminds me of a strong woman who has come through a lot; teaming it with quote really spoke to me, and in the same way that little boys are made from slugs and snails in the nursery rhyme, I see this survivor as being made from Starfire and Crystals, but only realising when she has come out on the other side of her battles.
Thanks for reading, I hope you like this as much as I do.
Steffi :o)
Xx
I would like to enter this into the following challenges :
A Creative Need - Collages - here https://acreativeneed.wordpress.com/join-in-the-monthly-challenge/
Mixed Media - Creative Gym Exercise 6 - Words and Letters - here http://mixedmediaplace.blogspot.co.uk/2015/03/creative-gym-exercise-6.html
Stamp and Create - April Anything Goes - here http://stampandcreateblog.blogspot.co.uk/2015/04/april-challenge-anything-goes.html
and
Artful Times - Challenge 78 Tattered and Torn - I interpret my 'Survivor' as having been tattered and torn with her battle scars - here http://artfultimes.blogspot.co.uk/2015/04/challenge-78-tattered-and-torn.html
Showing posts with label challenge. Show all posts
Wednesday, 15 April 2015
Monday, 9 March 2015
Fantastic Workshop with Art Wynyard Warriors & the Amazing Finnabair!! :o)
I feel a little self indulgent as I have actually spent my Christmas and Birthday money on myself (!) and treated myself to a couple of workshops, organised by the lovely Sue Tucker. The workshops are held just outside Middlesborough in a great venue and Sue always lays on plenty of refreshments and chocolate!! Take a look here - https://www.facebook.com/NorthEastArtWorkshops?ref=br_tf ) this is the Facebook page where Sue advertises upcoming workshops. Firstly I got to spend another wonderful afternoon watching Finnabair do her thing, she is such an amazing artist and teacher, and so very generous with her hints and tips, then at the end of the month I get to play along with Andy Skinner - not bad eh?!
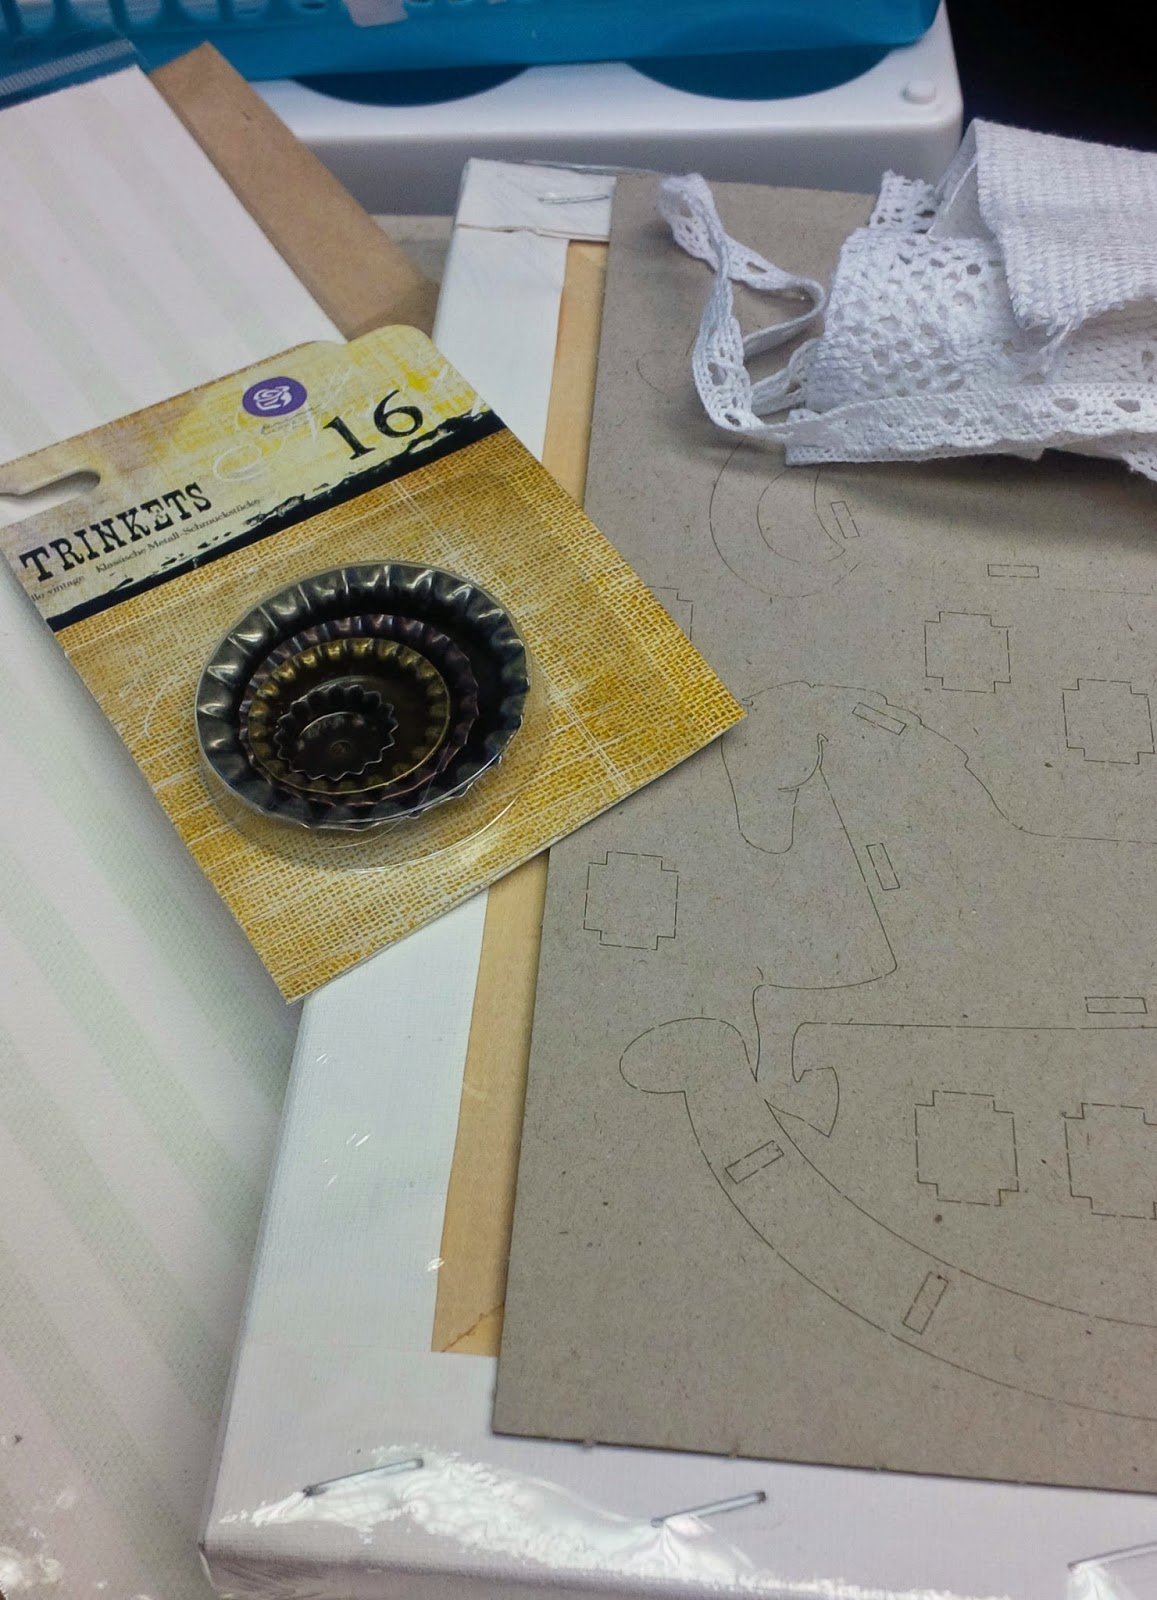
The workshop I attended was called Everyday Treasure, and involved turning an ordinary canvas into a steampunk-y shadow box to display a lovely little rocking horse. One of the most exciting bits when we first get sat down is peering into our goodie bags to see what we've got to play with!! Feels just like a naughty child spying on their Christmas presents early! Have a look at some of the lovely bits we got:
First bit was to set to and build the little rocking horse and then to begin to alter the frame:
As it is Finn's workshop, I won't share all of the steps as it would not be fair to her. Also as I say she is so generous with sharing her techniques that you would be far better watching some of the videos that she shares on her blog!! Needless to say that it involved lots of gesso, paints, metal embellishments, pigment sprays and lots of laughter!!
'Slightly' messy fingers!!
Group of Happy Crafters with our finished works of art, and mine is below :
I had such a lovely time, and met up with some fellow crafters who had shared the experience last time too, and now I'm so looking forward to next time!!
Thanks for reading :o)
Steffi xx
I would like to enter this canvas into the following challenges:
Mixed Media Challenge (brand new challenge!!) - Anything Goes - here: http://mixedmediaworld.blogspot.co.uk/2015/03/welcome-to-mixed-media-world.html
All Crafts Challenge Feb/March - Anything Goes (but no cards) - here: http://www.sparklingblackrose-craftmylife.blogspot.co.uk/2015/02/all-crafts-challenge-febmarch.html
Imagination Crafts March Challenge - Always Anything Goes - here: http://imagination-craftschallenges.blogspot.co.uk/2015/03/imagination-crafts-march-challenge.html
and
Crafty Calendar Challenge March Challenge - Add Some Metal - here: http://craftycalendarchallenge.blogspot.co.uk/2015/03/crafty-calendar-march-challenge-add.html
Saturday, 28 February 2015
Domino Book for Rhedd's Creative Spirit DT
Hi :) today for my March DT piece for Rhedd's Creative Spirit, I'm sharing a little domino book I made for a swap - it had to follow a butterfly theme (not hard I think every crafter has butterflies in their stash!!) and have lashings of lace!
So I started with two ordinary dominoes and coloured them with alcohol inks. I had forgotten how much I love alcohol inks - the colours are great and you can use them in lots of different ways. Definitely worth a quick look on Pinterest (or if you're like me that will turn into a few hours!)
The next step was to create an inside for the book. I measured the dominoes length and then cut a strip of cream card a fraction smaller and concertina'd it, going over the creases with a bone folder to make sure they were crisp. Then I used a distress ink pad that toned with the dominoes to shade the edge of the folds.
Next I took a few of my butterfly stamps (I did let a dragonfly slip in) and stamped along one side of the card. Flipping it over, I attached a layer of lace tape and some pink gem butterflies. Before attaching the card to the inside of the dominoes I attached a length of crocheted lace to each, so that the book could be tied shut when finished.
Another part of the brief was that the book needed to have feet so it could stand up. I took 4 little beads that were a pale jade colour and glued them into place. On the front of the domino book I used another piece of the lace tape and also added a floral wooden butterfly.
I'm really pleased with it, so much so that it was a wrench to send it away! It is definitely my new favourite!!
Please pop across to Rhedd's Creative Spirit and see all the loveliness created by my teamies.
Thanks for reading :o)
Steffi xx
I would like to enter this into the following challenge:
Dream it up - Frilly and Fabulous - here : http://www.dreamweaverstencils.blogspot.co.uk/2015/02/frilly-and-fabulous-week-one.html?m=1
Saturday, 31 January 2015
Altered Journal cover for Rhedd's Creative Spirit DT
Today I'm sharing my second Design Team piece for Rhedd's Creative Spirit :o)
I've decided I really need to commit some time to journaling; firstly because it just looks Amazing!! and secondly because it will help with some of the self-confidence issues that still come up with me from time to time.
So, if I'm going to journal, I need a journal, right?!? I bought a great 6 x 6 scrapbook from Hobbycraft during their sale (£2.50 - can't go wrong at that!) it had nice sturdy inner pages and a ribbon tie fastening. Only thing is the covers were just plain white, and boring!! I decided to change that!
These are the plain covers, removed and ready for action!
The first thing I did was to cover them in gesso, to give a nice surface to work on. Once that was dry I reached for some stencils and some texture paste.
Hopefully you will just about see the hexaganol pattern in the top right corner, and may be able to pick out some of the other bits - it was clear texture paste though so I tilted them under the light to try and catch them.
Next step was to go a little crazy with the embellishments! I used a variety of pieces, some Finnabair ones (obviously!) some paper roses, strips of lace and some wooden bits from That Craft Place - that's where I got the 'Dream' word from - I think I might need to buy another - I love it!!
Once the embellishments were all stuck where I wanted them, and the glue had dried, I went back over it all with the gesso again, to give a nice even surface.
Then, out came my ink sprays! I think I may have too many (if that's possible!?), they only just fit in their box, and that's only after a lot of shuffling about! This effect was achieved using a mixture of both glimmer sprays and some ink sprays from Dylusions, spraying one, letting it dry and then moving on to the next. I also sprayed plain water on to dilute them a little more so that they would run and cover the whole area. The final step was to take some copper acrylic paint and touch up the raised areas.
I am so pleased with the result, and the covers really have a sparkle all their own due to the glitter sprays and the copper paint, although it doesn't fully show in the pictures. I think I may need another trip to Hobbycraft to see if they've any scrapbooks left!
Don't forget to pop over to Rhedd's Creative Spirit to see what the other team members have created.
Thanks for reading :o)
Steffi xx
I would like to enter this into the Sparkle and Shine challenge at Finnabair's blog - here - http://tworzysko.blogspot.co.uk/2015/01/sparkle-shine-blog-hop-challenge.html
I've decided I really need to commit some time to journaling; firstly because it just looks Amazing!! and secondly because it will help with some of the self-confidence issues that still come up with me from time to time.
So, if I'm going to journal, I need a journal, right?!? I bought a great 6 x 6 scrapbook from Hobbycraft during their sale (£2.50 - can't go wrong at that!) it had nice sturdy inner pages and a ribbon tie fastening. Only thing is the covers were just plain white, and boring!! I decided to change that!
These are the plain covers, removed and ready for action!
The first thing I did was to cover them in gesso, to give a nice surface to work on. Once that was dry I reached for some stencils and some texture paste.
Next step was to go a little crazy with the embellishments! I used a variety of pieces, some Finnabair ones (obviously!) some paper roses, strips of lace and some wooden bits from That Craft Place - that's where I got the 'Dream' word from - I think I might need to buy another - I love it!!
Once the embellishments were all stuck where I wanted them, and the glue had dried, I went back over it all with the gesso again, to give a nice even surface.
Then, out came my ink sprays! I think I may have too many (if that's possible!?), they only just fit in their box, and that's only after a lot of shuffling about! This effect was achieved using a mixture of both glimmer sprays and some ink sprays from Dylusions, spraying one, letting it dry and then moving on to the next. I also sprayed plain water on to dilute them a little more so that they would run and cover the whole area. The final step was to take some copper acrylic paint and touch up the raised areas.
I am so pleased with the result, and the covers really have a sparkle all their own due to the glitter sprays and the copper paint, although it doesn't fully show in the pictures. I think I may need another trip to Hobbycraft to see if they've any scrapbooks left!
Don't forget to pop over to Rhedd's Creative Spirit to see what the other team members have created.
Thanks for reading :o)
Steffi xx
I would like to enter this into the Sparkle and Shine challenge at Finnabair's blog - here - http://tworzysko.blogspot.co.uk/2015/01/sparkle-shine-blog-hop-challenge.html
Monday, 26 January 2015
Three of a Kind - Steampunk ATCs
I'm getting back into my ATC making, after not really getting into the groove with them last month when my health was low.
Today I'm sharing a set of three with you that I've made for a swap on a Facebook Group, there was no specified theme, just that three were required to enter. Being a bit of a steampunk lover, I thought I'd use that as my theme.
My first step was to cover the base card with some designer paper that was printed with French newspaper. I put on three ripped layers and inked the edges using Antique Linen distress ink, I also distressed the edges slightly using scissor blades.
I recently found some brilliant wooden embellishments in The Range, a set of hats - top hats, bowler hats and homburgs - together with a mixture of moustaches. I picked out one of each and coloured them black using a sharpie, then glued them into position on the front of the ATCs. I also found a set of sticky notes in the same shop that had an assortment of pointing hands, lightbulbs and the like on them so I added one of these to each ATC, and wrote a suitable word on each. The finishing touch was to stamp some little cog wheels and then add a little pearlised gold texture paste to some of the edges on each.
Can't wait to see what style of ATCs I get in return!!
Thanks for reading :o)
Steffi xx
I would like to enter this into the following swaps:
SanDee & Amelies Steampunk Challenges - Three's my lucky number - here : http://sandee-and-amelie.blogspot.co.at/2015/01/happy-new-year-and-new-challenge.html
Suzy Bee's Bloomin' Challenge Blog - Challenge 64 - Anything Goes with a twist - Use Layers - here : http://suzypantssmarty.blogspot.co.uk/2015/01/24-january-challenge-64-atg-with-twist.html
Daring Cardmakers -You Can Leave Your Hat On - here : http://suzypantssmarty.blogspot.co.uk/2015/01/24-january-challenge-64-atg-with-twist.html
Craft Stampers Take it Make it Challenge - Take a Stamp - here : http://craftstamper.blogspot.co.uk/2015/01/take-it-make-it-challenge-all-new-for.html
and
Left of Center Creative Challenges - Challenge 62 - Layer it Up - here : http://leftofcenterchallenges.blogspot.ca/2015/01/challenge-62-layer-it-up-with-that.html
Today I'm sharing a set of three with you that I've made for a swap on a Facebook Group, there was no specified theme, just that three were required to enter. Being a bit of a steampunk lover, I thought I'd use that as my theme.
My first step was to cover the base card with some designer paper that was printed with French newspaper. I put on three ripped layers and inked the edges using Antique Linen distress ink, I also distressed the edges slightly using scissor blades.
I recently found some brilliant wooden embellishments in The Range, a set of hats - top hats, bowler hats and homburgs - together with a mixture of moustaches. I picked out one of each and coloured them black using a sharpie, then glued them into position on the front of the ATCs. I also found a set of sticky notes in the same shop that had an assortment of pointing hands, lightbulbs and the like on them so I added one of these to each ATC, and wrote a suitable word on each. The finishing touch was to stamp some little cog wheels and then add a little pearlised gold texture paste to some of the edges on each.
Can't wait to see what style of ATCs I get in return!!
Thanks for reading :o)
Steffi xx
I would like to enter this into the following swaps:
SanDee & Amelies Steampunk Challenges - Three's my lucky number - here : http://sandee-and-amelie.blogspot.co.at/2015/01/happy-new-year-and-new-challenge.html
Suzy Bee's Bloomin' Challenge Blog - Challenge 64 - Anything Goes with a twist - Use Layers - here : http://suzypantssmarty.blogspot.co.uk/2015/01/24-january-challenge-64-atg-with-twist.html
Daring Cardmakers -You Can Leave Your Hat On - here : http://suzypantssmarty.blogspot.co.uk/2015/01/24-january-challenge-64-atg-with-twist.html
Craft Stampers Take it Make it Challenge - Take a Stamp - here : http://craftstamper.blogspot.co.uk/2015/01/take-it-make-it-challenge-all-new-for.html
and
Left of Center Creative Challenges - Challenge 62 - Layer it Up - here : http://leftofcenterchallenges.blogspot.ca/2015/01/challenge-62-layer-it-up-with-that.html
Monday, 8 December 2014
Shabby-chic mixed media canvas
Today I'm sharing a Vintage styled, mixed media canvas that I've created as an end of year gift for a swap on Facebook. The only brief was for it to be mixed media and to be able to house a little calendar that could be replaced each year.
I started with a deep framed 8x8" canvas and then using a scraped paint technique gave it a base of a light terracotta with highlights of a mossy green and gold. The edge was done in a darker terracotta (created by mixing the other colours together and adding a bit of red). I then did the same with 2 smaller canvases - one was 2.5 x 2.5" square and the other 2 x 1" the smaller one I also wrapped with some lace border ; and then glued them in place on the main canvas.
Next bit - embellishments :o) I love digging through all my bits and bobs decided what to use! I chose some metal filigree pieces and added paper roses, together with a little bottle cap shaped piece holding a picture of a butterfly. I stamped some sentiments onto tissue paper and used melted beeswax to place these. I also went around the edge of the larger canvas with some flourishes in dark glitter glue. A lovely metal dragonfly placed on the lace covered canvas and a matching piece of lace across one corner finished of the main piece.
Then I had to work out how to place the calendar and how to make sure it could be replaced each year.
I realised that the calendar was just a little smaller than a credit card so I decided to cut a sleeve from a plastic card wallet and used some patterned packaging cardboard as a back for it. I made a little flap out of some scrap card and used this to fasten it to the bottom of the canvas, covering it with some washi tape.
I'm really pleased with it and hope my swap partner is too.
I would like to enter this canvas into the following challenges :
Sisterhood of Snarky Stampers - Challenge 22 V is for Vintage - here http://snarkystampers.blogspot.ca/2014/11/soss-22-v-is-for-vintage.html?m=1
Sugar Creek Hollow - Challenge 101 Not a Card - here http://sugarcreekhollow.blogspot.co.uk/2014/12/101-not-card-important-announcement.html?m=1
Artist Trading Post Exchange - Recycle for Christmas - here http://artisttradingpost.blogspot.co.uk/2014/11/recycle-for-christmas.html?m=1 (recycled packaging and card wallet)
Frilly & Funkie - A Vintage Holiday - here http://frillyandfunkie.blogspot.co.uk/2014/12/a-vintage-holiday.html?m=1 (created for New Years)
And
Miriam's Crafting Blog - Challenge 19 Handmade Gift - here http://miriamscraftingblog.com/1/post/2014/12/miriams-crafting-blogs-19th-monthly-challenge-handmade-gifts.html
Thanks for reading
Stefanie xx
I started with a deep framed 8x8" canvas and then using a scraped paint technique gave it a base of a light terracotta with highlights of a mossy green and gold. The edge was done in a darker terracotta (created by mixing the other colours together and adding a bit of red). I then did the same with 2 smaller canvases - one was 2.5 x 2.5" square and the other 2 x 1" the smaller one I also wrapped with some lace border ; and then glued them in place on the main canvas.
Next bit - embellishments :o) I love digging through all my bits and bobs decided what to use! I chose some metal filigree pieces and added paper roses, together with a little bottle cap shaped piece holding a picture of a butterfly. I stamped some sentiments onto tissue paper and used melted beeswax to place these. I also went around the edge of the larger canvas with some flourishes in dark glitter glue. A lovely metal dragonfly placed on the lace covered canvas and a matching piece of lace across one corner finished of the main piece.
Then I had to work out how to place the calendar and how to make sure it could be replaced each year.
I realised that the calendar was just a little smaller than a credit card so I decided to cut a sleeve from a plastic card wallet and used some patterned packaging cardboard as a back for it. I made a little flap out of some scrap card and used this to fasten it to the bottom of the canvas, covering it with some washi tape.
I'm really pleased with it and hope my swap partner is too.
I would like to enter this canvas into the following challenges :
Sisterhood of Snarky Stampers - Challenge 22 V is for Vintage - here http://snarkystampers.blogspot.ca/2014/11/soss-22-v-is-for-vintage.html?m=1
Sugar Creek Hollow - Challenge 101 Not a Card - here http://sugarcreekhollow.blogspot.co.uk/2014/12/101-not-card-important-announcement.html?m=1
Artist Trading Post Exchange - Recycle for Christmas - here http://artisttradingpost.blogspot.co.uk/2014/11/recycle-for-christmas.html?m=1 (recycled packaging and card wallet)
Frilly & Funkie - A Vintage Holiday - here http://frillyandfunkie.blogspot.co.uk/2014/12/a-vintage-holiday.html?m=1 (created for New Years)
And
Miriam's Crafting Blog - Challenge 19 Handmade Gift - here http://miriamscraftingblog.com/1/post/2014/12/miriams-crafting-blogs-19th-monthly-challenge-handmade-gifts.html
Thanks for reading
Stefanie xx
Thursday, 30 October 2014
31 Days of Halloween - Day 30
Wow! Welcome to the penultimate day on the wonderful Smeared and Smudged bloghop - 31 Days of Halloween!! If you haven't already do visit the other Wicked Bloggers following the links on my sidebar.
Today's offering is a pair of steampunk vampires, showcased on Tim Holt's die-cut cabinet cards.
I've cut 4 of the cabinet cards - 2 for the front and 2 for the back - and used Tim's Coloured Crackle technique - as shown in his Compendium of Curiosities III - page 53. I cant share the steps of this process as it is the focus for the latest CC3C organised by Linda Ledbetter which you can find here http://lindaledbetter.com/2014/10/compendium-of-curiosities-3-challenge-14.html . I think it gives an authentic worn leather look when shown in the browns I have used, but it's amazing how different it can look in different colours.
The centerpieces are a pair of free digi stamps that I got here http://craftymomentscardmaking.blogspot.co.uk/2012/05/steampunk-vampire-digis.html. I've coloured them with promarkers but kept the colours quite muted to give them an older look.
As I am wanting to enter this into the CC3C challenge mentioned above I decided to have a look at the requirements of the other fabulous Tim Holt themed challenge site - A Vintage Journey - and found that the current theme is Halloween using Tim's die-cuts - bonus!! So as its been a while since I've entered either I thought I would combine the two.
I wanted to use slightly 3d embellishments so i die-cut some of Tim's cogs from black cardstock and then went over them with a metallic bronze pen. I have also added some of Finnabair's mechanicals and a small Prima rose which I've also highlighted bronze.
I really like the finished project and hope that you do too!
Thanks for reading
Stefanie xx
I would like to enter this into the following challenges:
Compendium of Curiosities 3 - Challenge 14 - here http://lindaledbetter.com/2014/10/compendium-of-curiosities-3-challenge-14.html
A Vintage Journey - Challenge 17 Halloween to Die For - here http://www.vintagejourney.com/2014/10/challenge-17-halloween-to-die-for.html
Altered Eclectics = October challenge - here http://alteredeclectics.blogspot.co.uk/2014/10/another-month-another-challenge.html
and
Opus Gluei - Challenge 194 Ghostly Goings On - here http://opus-gluei.blogspot.co.uk/2014/10/challenge-194-ghostly-goings-on.html
Today's offering is a pair of steampunk vampires, showcased on Tim Holt's die-cut cabinet cards.
The centerpieces are a pair of free digi stamps that I got here http://craftymomentscardmaking.blogspot.co.uk/2012/05/steampunk-vampire-digis.html. I've coloured them with promarkers but kept the colours quite muted to give them an older look.
As I am wanting to enter this into the CC3C challenge mentioned above I decided to have a look at the requirements of the other fabulous Tim Holt themed challenge site - A Vintage Journey - and found that the current theme is Halloween using Tim's die-cuts - bonus!! So as its been a while since I've entered either I thought I would combine the two.
I wanted to use slightly 3d embellishments so i die-cut some of Tim's cogs from black cardstock and then went over them with a metallic bronze pen. I have also added some of Finnabair's mechanicals and a small Prima rose which I've also highlighted bronze.
I really like the finished project and hope that you do too!
Thanks for reading
Stefanie xx
I would like to enter this into the following challenges:
Compendium of Curiosities 3 - Challenge 14 - here http://lindaledbetter.com/2014/10/compendium-of-curiosities-3-challenge-14.html
A Vintage Journey - Challenge 17 Halloween to Die For - here http://www.vintagejourney.com/2014/10/challenge-17-halloween-to-die-for.html
Altered Eclectics = October challenge - here http://alteredeclectics.blogspot.co.uk/2014/10/another-month-another-challenge.html
and
Opus Gluei - Challenge 194 Ghostly Goings On - here http://opus-gluei.blogspot.co.uk/2014/10/challenge-194-ghostly-goings-on.html
Tuesday, 28 October 2014
31 Days of Halloween - Day 28
Hi - I'm sharing another card with you today, a little late again I'm afraid our UK clocks have just changed - they go back an hour, and it always takes me a while to get used to it!!
The centrepiece of this card is by Simply B and was offered as a free digital stamp by them in conjuction with Kit and Clouder who do online colouring classes. They offered it to be used in a Facebook challenge, which was to colour her in monochrome but with a splash of colour.
I used my grey and black promarkers for the main part and then bright pink to bring out her Day of the Dead make-up. I've then matter her up on a piece of grey card set at an angle on top of a square black card. The sentiment, just 'Halloween' for which I've used lettered brads on a peice of bright pink card to tie in with the colouring.
I'm still not completely happy with my colouring but I think it is getting better, I'm promising myself the Kit and Clouder classes when I have some spare pennies (maybe a Christmas present :o) ).
Hoping you like her!
Thanks for reading, do remember the rest of the Wicked Bloggers are also sharing Halloween makes each day, the list of links is over on my side-bar.
Stefanie xx
I also wish to enter this card into the following challenges:
Fantastic Tuesdays - Anything Goes with a Twist - Monochrome - here: http://fattastictuesday.blogspot.co.uk/2014/10/fan-tastic-tuesday-challenge-59.html
Sweet Stamps - 193 Spooky - here: http://sweetstampsblog.blogspot.co.uk/2014/10/challenge-193-spooky.html
Dream Valley Challenges - 93 Halloween - here : http://dreamvalleychallenges.blogspot.ca/2014/10/challenge-93-halloween.html
Through the Purple Haze - 65 Halloween - here: http://www.throughthepurplehazechallenges.blogspot.co.uk/2014/10/65-halloween-with-rick-st-dennis.html
and Timbro Scrap Mania Stamping Challenge Blog - 103 Halloween is coming - here: http://timbroscrapmania.blogspot.it/2014/10/challenge-103-halloween-is-coming.html
The centrepiece of this card is by Simply B and was offered as a free digital stamp by them in conjuction with Kit and Clouder who do online colouring classes. They offered it to be used in a Facebook challenge, which was to colour her in monochrome but with a splash of colour.
I used my grey and black promarkers for the main part and then bright pink to bring out her Day of the Dead make-up. I've then matter her up on a piece of grey card set at an angle on top of a square black card. The sentiment, just 'Halloween' for which I've used lettered brads on a peice of bright pink card to tie in with the colouring.
I'm still not completely happy with my colouring but I think it is getting better, I'm promising myself the Kit and Clouder classes when I have some spare pennies (maybe a Christmas present :o) ).
Hoping you like her!
Thanks for reading, do remember the rest of the Wicked Bloggers are also sharing Halloween makes each day, the list of links is over on my side-bar.
Stefanie xx
I also wish to enter this card into the following challenges:
Fantastic Tuesdays - Anything Goes with a Twist - Monochrome - here: http://fattastictuesday.blogspot.co.uk/2014/10/fan-tastic-tuesday-challenge-59.html
Sweet Stamps - 193 Spooky - here: http://sweetstampsblog.blogspot.co.uk/2014/10/challenge-193-spooky.html
Dream Valley Challenges - 93 Halloween - here : http://dreamvalleychallenges.blogspot.ca/2014/10/challenge-93-halloween.html
Through the Purple Haze - 65 Halloween - here: http://www.throughthepurplehazechallenges.blogspot.co.uk/2014/10/65-halloween-with-rick-st-dennis.html
and Timbro Scrap Mania Stamping Challenge Blog - 103 Halloween is coming - here: http://timbroscrapmania.blogspot.it/2014/10/challenge-103-halloween-is-coming.html
Tuesday, 21 October 2014
31 Days of Halloween - Day 21
Wow - can you believe we're over 2/3's the way through this amazing blog hop organised by Smeared and Smudged?! Hope you're enjoying it as much as I am :). If you've gotten a little lost along the way, the blog roll is on my sidebar :)
Today I am sharing a tag I've made, with reference to Edgar Allan Poe, the gothic writer and poet. He was one of the first gothic style writers, and in my mind his work The Raven is inextricably linked with Halloween.
I got a wonderful quote sheet from Gecko Galz to use in one of their challenges, and I have also shared this on their Facebook page :o)
I started with a Ranger tag in Kraft card (size 6 1/4" x 3 1/4") and firstly blended distress inks over it.
I used Dusty Concord, Brushed Corduroy, Faded Jeans and Spiced Marmalade to create a nice background on the tag.
I've then used some of the quotes from the Gecko Galz page, again having blended over them with distress inks, added a stamp of E A Poe himself from a Wendy Vecchi set, and a lovely little raven laser cut from That Craft Place. I've then finished with a metal MME sentiment 'be an original' and a Tim Holtz pen-nib. The ribbons are a velvety brown one, a striped organza one and a thinner cream coloured one.
I hope you like it :o)
Thanks for reading
Stefanie xx
I wish to enter this tag into the Quoth the Raven - Challenge 37 'Tag Along' here: http://poequoththeraven.blogspot.co.uk/2014/09/quoth-raven-challenge-37-tag-along.html
Tag Along - #60 Poe - here: http://tagalongchallenge.blogspot.co.uk/2014/10/tag-60-edgar-allen-poe.html#comment-form
and also the Gecko galz Papercrafting Challenge page on Facebook - here: https://www.facebook.com/groups/654948344560159/
Today I am sharing a tag I've made, with reference to Edgar Allan Poe, the gothic writer and poet. He was one of the first gothic style writers, and in my mind his work The Raven is inextricably linked with Halloween.
I got a wonderful quote sheet from Gecko Galz to use in one of their challenges, and I have also shared this on their Facebook page :o)
I started with a Ranger tag in Kraft card (size 6 1/4" x 3 1/4") and firstly blended distress inks over it.
I used Dusty Concord, Brushed Corduroy, Faded Jeans and Spiced Marmalade to create a nice background on the tag.
I've then used some of the quotes from the Gecko Galz page, again having blended over them with distress inks, added a stamp of E A Poe himself from a Wendy Vecchi set, and a lovely little raven laser cut from That Craft Place. I've then finished with a metal MME sentiment 'be an original' and a Tim Holtz pen-nib. The ribbons are a velvety brown one, a striped organza one and a thinner cream coloured one.
I hope you like it :o)
Thanks for reading
Stefanie xx
I wish to enter this tag into the Quoth the Raven - Challenge 37 'Tag Along' here: http://poequoththeraven.blogspot.co.uk/2014/09/quoth-raven-challenge-37-tag-along.html
Tag Along - #60 Poe - here: http://tagalongchallenge.blogspot.co.uk/2014/10/tag-60-edgar-allen-poe.html#comment-form
and also the Gecko galz Papercrafting Challenge page on Facebook - here: https://www.facebook.com/groups/654948344560159/
Monday, 20 October 2014
31 Days of Halloween - Day 20
Firstly - thank you so much everyone for your lovely feedback on my shadow box!! I was away overnight (which is why this is a little late being posted) so haven't yet had chance to reply to them, but I will go back through them later on :)
Today I wanted to share a 'cutesy ' Halloween card. This image is from Dilly Beans again, and I've coloured her with my promarkers and a crayola metallic marker in silver.
I've then matted and layered her, firstly with an 'echo' outline in black card and then two layers of Halloween themed papers, finishing on a simple single fold black card.
I thought this would a complete contrast to my recent posts, and I hope you like her!
Thanks for reading & please remember to visit all the other Wicked Bloggers following the link in my sidebar.
Stefanie
I would like to enter this into the Dilly Beans challenge - Halloween - here: http://www.dillybeanschallenge.blogspot.co.uk/2014/10/dilly-beans-challenge-halloween.html?m=1
Today I wanted to share a 'cutesy ' Halloween card. This image is from Dilly Beans again, and I've coloured her with my promarkers and a crayola metallic marker in silver.
I've then matted and layered her, firstly with an 'echo' outline in black card and then two layers of Halloween themed papers, finishing on a simple single fold black card.
I thought this would a complete contrast to my recent posts, and I hope you like her!
Thanks for reading & please remember to visit all the other Wicked Bloggers following the link in my sidebar.
Stefanie
I would like to enter this into the Dilly Beans challenge - Halloween - here: http://www.dillybeanschallenge.blogspot.co.uk/2014/10/dilly-beans-challenge-halloween.html?m=1
Saturday, 18 October 2014
31 Days of Halloween - Day 19 - Big Reveal :o)
Well it's past midnight in the UK so I'm posting this now as have a day out planned :)
Well if you've been following along with the Smeared and Smudged blog hop you will have seen my previous posts giving little sneak peeks of today's full project. I hope you're ready and that you're not disappointed!
Here we go then :
The little shadow box is from Tando, it's been really fun to do. I decided to just shade the frame slightly with Distress Inks in Spiced Marmalade blended with Dusty Concord. I didn't want to paint the frame on this one as I wanted the contents in each little alcove to be the main focus.
There were two cubbies I didn't share, just because they were very simple really the top left section holds a little wooden witches hat (That Craft Place) and the one on the bottom row behind the tickets is holding just some bits of ghost confetti. I've also added a little skull headed key to the right hand side of the outer frame.
As a reminder, these are all the sneak peeks that led us here:
I hope you think it was worth the wait and the suspense - thanks for sticking with it!!
Remember to visit the other Wicked Bloggers following the link in the blog roll on my sidebar - thanks for reading
Stefanie
I would like to enter this in the following challenges :
Haunted Design House - Use Wood - here: http://haunteddesignhouse.blogspot.co.uk/2014/10/macabre-monday-you-wood-do-that.html
That's Crafty - Spooky - here: http://thatscraftychallenges.blogspot.co.uk/2014/10/spooky.html
Altered Eclectics - Another Month, Another Challenge - here: http://alteredeclectics.blogspot.co.uk/2014/10/another-month-another-challenge.html
Craft and Smash - Gothic - here: http://craftandsmash.blogspot.it/2014/10/tema-gothic.html
My Artistic Adventure Challenge Blog - Challenge 11 Halloween/Fall - here: http://myartisticadventureschallenge.blogspot.co.uk/2014/10/maa-11-halloweenfall-challenge.html
and
Rhedd's Creative Spirit - October Challenge Halloween or Not - here: http://rheddscreativespirit.blogspot.co.uk/2014/10/october-challengehalloween-or-not.html
Well if you've been following along with the Smeared and Smudged blog hop you will have seen my previous posts giving little sneak peeks of today's full project. I hope you're ready and that you're not disappointed!
Here we go then :
The little shadow box is from Tando, it's been really fun to do. I decided to just shade the frame slightly with Distress Inks in Spiced Marmalade blended with Dusty Concord. I didn't want to paint the frame on this one as I wanted the contents in each little alcove to be the main focus.
There were two cubbies I didn't share, just because they were very simple really the top left section holds a little wooden witches hat (That Craft Place) and the one on the bottom row behind the tickets is holding just some bits of ghost confetti. I've also added a little skull headed key to the right hand side of the outer frame.
As a reminder, these are all the sneak peeks that led us here:
I hope you think it was worth the wait and the suspense - thanks for sticking with it!!
Remember to visit the other Wicked Bloggers following the link in the blog roll on my sidebar - thanks for reading
Stefanie
I would like to enter this in the following challenges :
Haunted Design House - Use Wood - here: http://haunteddesignhouse.blogspot.co.uk/2014/10/macabre-monday-you-wood-do-that.html
That's Crafty - Spooky - here: http://thatscraftychallenges.blogspot.co.uk/2014/10/spooky.html
Altered Eclectics - Another Month, Another Challenge - here: http://alteredeclectics.blogspot.co.uk/2014/10/another-month-another-challenge.html
Craft and Smash - Gothic - here: http://craftandsmash.blogspot.it/2014/10/tema-gothic.html
My Artistic Adventure Challenge Blog - Challenge 11 Halloween/Fall - here: http://myartisticadventureschallenge.blogspot.co.uk/2014/10/maa-11-halloweenfall-challenge.html
and
Rhedd's Creative Spirit - October Challenge Halloween or Not - here: http://rheddscreativespirit.blogspot.co.uk/2014/10/october-challengehalloween-or-not.html
Subscribe to:
Posts (Atom)