Showing posts with label steampunk. Show all posts

Monday, 9 March 2015

Fantastic Workshop with Art Wynyard Warriors & the Amazing Finnabair!! :o)

I feel a little self indulgent as I have actually spent my Christmas and Birthday money on myself (!) and treated myself to a couple of workshops, organised by the lovely Sue Tucker.  The workshops are held just outside Middlesborough in a great venue and Sue always lays on plenty of refreshments and chocolate!! Take a look here - https://www.facebook.com/NorthEastArtWorkshops?ref=br_tf ) this is the Facebook page where Sue advertises upcoming workshops.  Firstly I got to spend another wonderful afternoon watching Finnabair do her thing, she is such an amazing artist and teacher, and so very generous with her hints and tips, then at the end of the month I get to play along with Andy Skinner - not bad eh?!

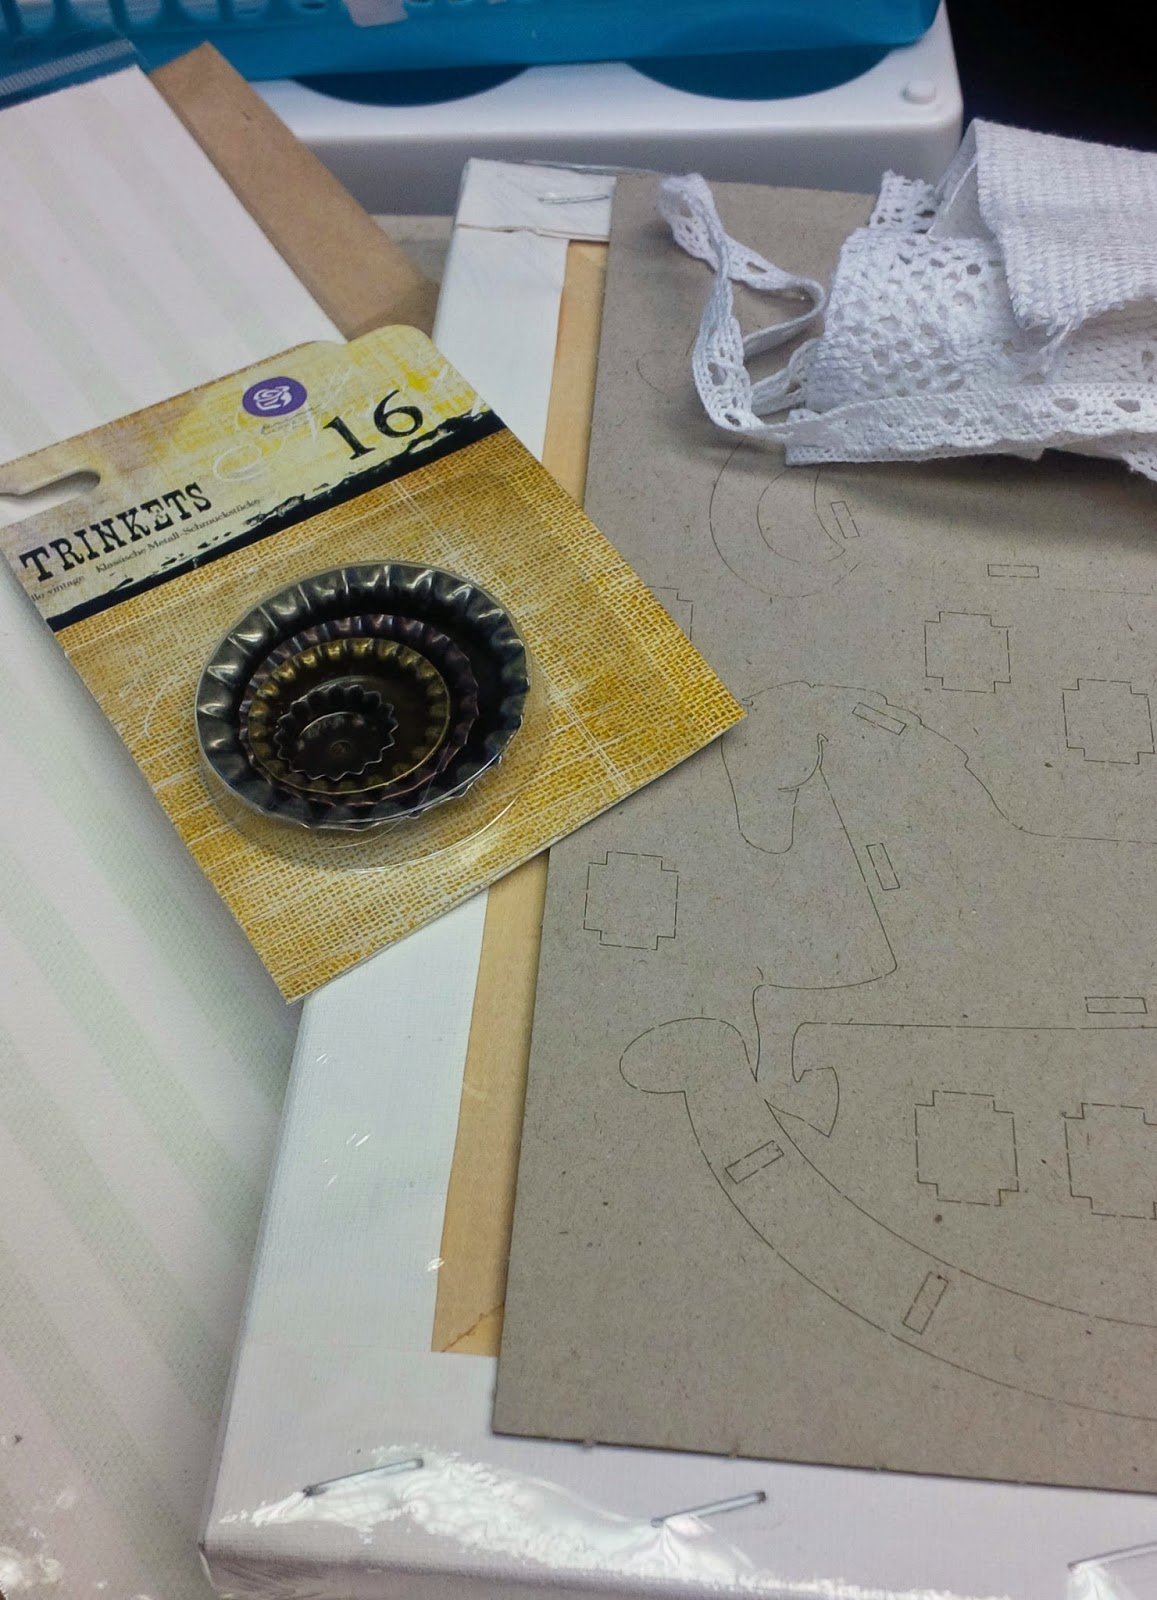
The workshop I attended was called Everyday Treasure, and involved turning an ordinary canvas into a steampunk-y shadow box to display a lovely little rocking horse.  One of the most exciting bits when we first get sat down is peering into our goodie bags to see what we've got to play with!! Feels just like a naughty child spying on their Christmas presents early!  Have a look at some of the lovely bits we got:


First bit was to set to and build the little rocking horse and then to begin to alter the frame:


As it is Finn's workshop, I won't share all of the steps as it would not be fair to her.  Also as I say she is so generous with sharing her techniques that you would be far better watching some of the videos that she shares on her blog!!  Needless to say that it involved lots of gesso, paints, metal embellishments, pigment sprays and lots of laughter!!


'Slightly' messy fingers!!


Group of Happy Crafters with our finished works of art, and mine is below :


I had such a lovely time, and met up with some fellow crafters who had shared the experience last time too, and now I'm so looking forward to next time!!

Thanks for reading :o)
Steffi xx

I would like to enter this canvas into the following challenges:

Mixed Media Challenge (brand new challenge!!) - Anything Goes - here: http://mixedmediaworld.blogspot.co.uk/2015/03/welcome-to-mixed-media-world.html 

All Crafts Challenge Feb/March - Anything Goes (but no cards) - here: http://www.sparklingblackrose-craftmylife.blogspot.co.uk/2015/02/all-crafts-challenge-febmarch.html

Imagination Crafts March Challenge - Always Anything Goes - here:  http://imagination-craftschallenges.blogspot.co.uk/2015/03/imagination-crafts-march-challenge.html

and

Crafty Calendar Challenge March Challenge - Add Some Metal - here:  http://craftycalendarchallenge.blogspot.co.uk/2015/03/crafty-calendar-march-challenge-add.html


Monday, 26 January 2015

Three of a Kind - Steampunk ATCs

I'm getting back into my ATC making, after not really getting into the groove with them last month when my health was low.

Today I'm sharing a set of three with you that I've made for a swap on a Facebook Group, there was no specified theme, just that three were required to enter.  Being a bit of a steampunk lover, I thought I'd use that as my theme.

My first step was to cover the base card with some designer paper that was printed with French newspaper.  I put on three ripped layers and inked the edges using Antique Linen distress ink, I also distressed the edges slightly using scissor blades.

I recently found some brilliant wooden embellishments in The Range, a set of hats - top hats, bowler hats and homburgs - together with a mixture of moustaches.  I picked out one of each and coloured them black using a sharpie, then glued them into position on the front of the ATCs.  I also found a set of sticky notes in the same shop that had an assortment of pointing hands, lightbulbs and the like on them so I added one of these to each ATC, and wrote a suitable word on each.  The finishing touch was to stamp some little cog wheels and then add a little pearlised gold texture paste to some of the edges on each.


Can't wait to see what style of ATCs I get in return!!

Thanks for reading :o)
Steffi xx

I would like to enter this into the following swaps:

SanDee & Amelies Steampunk Challenges - Three's my lucky number - here : http://sandee-and-amelie.blogspot.co.at/2015/01/happy-new-year-and-new-challenge.html

Suzy Bee's Bloomin' Challenge Blog - Challenge 64 - Anything Goes with a twist - Use Layers - here : http://suzypantssmarty.blogspot.co.uk/2015/01/24-january-challenge-64-atg-with-twist.html

Daring Cardmakers -You Can Leave Your Hat On - here :  http://suzypantssmarty.blogspot.co.uk/2015/01/24-january-challenge-64-atg-with-twist.html

Craft Stampers Take it Make it Challenge - Take a Stamp - here : http://craftstamper.blogspot.co.uk/2015/01/take-it-make-it-challenge-all-new-for.html

and

Left of Center Creative Challenges - Challenge 62 - Layer it Up - here : http://leftofcenterchallenges.blogspot.ca/2015/01/challenge-62-layer-it-up-with-that.html


Thursday, 30 October 2014

31 Days of Halloween - Day 30

Wow! Welcome to the penultimate day on the wonderful Smeared and Smudged bloghop - 31 Days of Halloween!!  If you haven't already do visit the other Wicked Bloggers following the links on my sidebar.

Today's offering is a pair of steampunk vampires, showcased on Tim Holt's die-cut cabinet cards.


 I've cut 4 of the cabinet cards - 2 for the front and 2 for the back - and used Tim's Coloured Crackle technique - as shown in his Compendium of Curiosities III - page 53.  I cant share the steps of this process as it is the focus for the latest CC3C organised by Linda Ledbetter which you can find here http://lindaledbetter.com/2014/10/compendium-of-curiosities-3-challenge-14.html . I think it gives an authentic worn leather look when shown in the browns I have used, but it's amazing how different it can look in different colours.


The centerpieces are a pair of free digi stamps that I got here http://craftymomentscardmaking.blogspot.co.uk/2012/05/steampunk-vampire-digis.html.  I've coloured them with promarkers but kept the colours quite muted to give them an older look.

As I am wanting to enter this into the CC3C challenge mentioned above I decided to have a look at the requirements of the other fabulous Tim Holt themed challenge site - A Vintage Journey - and found that the current theme is Halloween using Tim's die-cuts - bonus!!  So as its been a while since I've entered either I thought I would combine the two.

I wanted to use slightly 3d embellishments so i die-cut some of Tim's cogs from black cardstock and then went over them with a metallic bronze pen.  I have also added some of Finnabair's mechanicals and a small Prima rose which I've also highlighted bronze.


I really like the finished project and hope that you do too!

Thanks for reading

Stefanie xx

I would like to enter this into the following challenges:

Compendium of Curiosities 3 - Challenge 14 - here http://lindaledbetter.com/2014/10/compendium-of-curiosities-3-challenge-14.html

A Vintage Journey - Challenge 17 Halloween to Die For - here http://www.vintagejourney.com/2014/10/challenge-17-halloween-to-die-for.html

Altered Eclectics = October challenge - here http://alteredeclectics.blogspot.co.uk/2014/10/another-month-another-challenge.html

and

Opus Gluei - Challenge 194 Ghostly Goings On - here  http://opus-gluei.blogspot.co.uk/2014/10/challenge-194-ghostly-goings-on.html

Friday, 1 August 2014

A 'Soft' Steampunk Tag

Hi - today I'm sharing an altered tag I've made for a one-to-one swap.

I really love altered tags - I've found many an amazing one on Pinterest but I've probably only made 3 or 4 myself so I joined up to this swap to challenge myself a little and push my boundaries :o). This was a different type of swap for me in that it had a list of elements/ingredients from which we had to choose at least 8 to incorporate into our tags. This is the list: Design paper, flowers, mini book, mini tag, bling, ribbon, doily, stamped image, dry embossing, heat embossing, stick pin, a single word, metal embellishment and bakers twine.

I started with a great piece of patterned paper - I can't decide if it looks more like part of the internals of a revolver or clock parts - I bought quite a few sheets of this just because I thought it was so unusual.   I cut this down to a tag that was 6 1/4" x 3 1/8". This was my base for the tag.


Next I took a slightly smaller manilla tag and sprayed it with small amounts of mica glimmer mists in Teal, Mulberry and Mango Crush, allowing the colours to blend gently into each other.

Whilst this dried, I decided I would make a little mini book. When you're making something for someone else, especially someone who you don't really know, it can be daunting as you don't know their particular tastes and how they marry up with your own. I mean I love steampunk but I know it's not to everybody's taste but having already chosen the base paper I decided on a slightly watered down version on a steampunk theme.   So to my mini book. I had some small pieces of cog embossed copper cardstock left over from a previous make (my steampunk trytich) which I decided to trim and use as a book cover. The inside of the book was made by accordion folding a length of watercolour paper. I then took a wooden toothpick, ran it through some Stampin Up ink in Soft Suede and dragged this across each page to (hopefully) give the impression of faded lines of text. I then over-stamped tiny symbols - such as crowns and fleur-de-lys - with Chocolate Chip ink and random words - like Smile and Beautiful - in a purple ink and I added little key and keyhole brads to the middle pages. I tied a little cord around the spine of my mini book and then glued the pages into place.


Next I moved back to the manilla tag. I stamped some cogs along the left hand side, and some criss- cross texturing to the top right hand side. I took some more watercolour paper to create a pocket for the mini book, leaving the 'bobbly' side outwards and then rubbed over it with the purple ink and added a little metal hinge plate.


Checking back to my 'recipe' list I decided to use the single word and heat embossing prompts. I've got loads of word stamps (might be slightly addicted!) and in particular some very ornate, swirly ones. Following my Soft Steampunk theme I chose the word 'Explore' and heat embossed this in three layers with copper embossing powders. I then restamped over the top with archival ink for definition.

For the finishing touches I edged each tag with my copper coloured Sharpie (which I also used on the metal hinge) and then glued then together. As a finishing touch - and to tick off my eighth 'ingredient' I added a small copper rose top left and bottom right.

I was really pleased with this tag (was almost tempted to keep it) and hope that it's recipient likes it too.


This is the tag I have received in return - it is lovely too :o). I especially like the folded brass filigree piece with the key (really love keys!!), the leaf and of course the butterflies. :o)


I would like to enter this tag into the following challenges :

SanDee & Amelie's Steampunk Challenges - Steampunk Summer Bonus Challenge 2014 - here:  http://sandee-and-amelie.blogspot.co.at/p/steampunk-summer-bonus-challenge-2014.html

The Artistic Stamper - August Challenge - Anything Goes - here:  http://www.theartisticstampercreativeteam.blogspot.co.uk/2014/08/augusts-challenge-anything-goes.html

Shopping Our Stash - Triple Threat (I've used ribboon; flowers; sprays/mists; and dry embossing) - here:  http://shoppingourstash.blogspot.co.uk/2014/07/sos-162-triple-threat.html

Simon Says Stamp Wednesday Challenge - Anything Goes - here:  http://www.simonsaysstampblog.com/wednesdaychallenge/simon-says-anything-goes-6/

Art Impressions - Like an EmBOSS - Wet or Dry Embossing - here:  http://artimpressionsstamps.blogspot.co.uk/2014/07/challenge-141-like-emboss-wet-or-dry.html

and That Craft Place- Anything Goes - here:  http://thatcraftplaceblog.blogspot.co.uk/2014/07/new-challenge-anything-goes.html


Thursday, 10 July 2014

July Smeared & Smudged Members' Blog-Hop - An Altered Tryptich


Hi - hard to believe it's been a month since my little deodorant rocket launched - but it really has! And that being the case, today sees the July member's blog-hop for Smeared and Smudged - I enjoyed June's so much I decided I'd join in again, so here we go!

First of all - that all important blog roll:

Sandy - http://altered-artifacts.blogspot.co.uk/
Jane - http://jcocraft.blogspot.co.uk/
Susan - http://susanrenshaw0404.blogspot.co.uk/
Barbara - http://blackholeartstudio.blogspot.co.uk/
'Me :o)'
Erin - http://followyourcraftyside.blogspot.co.uk/
Teresa - http://www.thefatcactus.co.uk/

So if you are following along with the hop, you should have arrived here from Barbara's blog and then there are two more stops after me!

The challenge theme for this month's hop was simply 'Steamy' for us to interpret as we wished.  I (obviously!) thought steampunk, and this is what I have created.

I have had a semi-prepped tryptich hanging around for ages - it was meant for my PaperArtsy piece earlier in the year but about 5 days earlier someone else posted almost exactly what was in my head so I shelved the tryptich and went with a canvas instead.  So I've been meaning to do something with it and this seemed just perfect.  So I gathered it and various steampunky papers together and put my thinking hat on!


Something else I've wanted to play with for a while is digital stamps so I downloaded 'Time for Tea' from The Paper Shelter and as a cup of tea can also be described as 'steamy' I used this as my main image. :o)  Please remember then that this is my first time - so be gentle with any comments!


In the final piece I've actually trimmed the image down to just the girl (and her cuppa) as it fitted the center better for me.  I first added my various papers (the clock piece in the center was from a 6" x 6" pad and was a little small so I added an extra piece to the bottom half and used some brown ribbon as a trim and to break the eye-line)  I also cut down an embossed tag and some bits from the cogs on the outer doors (see below) and used some Rub'n'Buff on them to bring out the detail.  I rubber stamped a piece of the watercolour paper with 'Steampunk Time' tore around it and edged it with Antique Linen distress ink.

The outside of the tryptich I've treated like doors.  I ran some copper coloured card through my Big Shot using a cogs embossing folder and trimmed it down to fit each side, then ran some metal tape around each piece which I dabbed with some Rub'n'Buff - by dabbing it, it left a slightly textured effect which I really liked.  I also fitted two small drawer handles on - but turned them sideways so they look like massive door handles.

And this is the finished piece - hope you like it!


I would like to enter this into the following challenges:

Altered Eclectics - (Always Mixed Media Altered Art) - July - here http://alteredeclectics.blogspot.co.uk/2014/07/new-month-and-so-another-challenge.html

A Step in the Darkness - Challenge 5 Anything Goes - here  http://a-step-in-the-darkness.blogspot.co.uk/2014/07/challenge-5.html
The East Wind Challenge - Challenge 10 Use Ribbon - here  http://www.theeastwind.com/2014/07/challenge-10-ribbon.html

and

The Stamping Chef - Challenge 37 Anything Goes - here  http://thestampingchef.com/Challenges/2014/07/09/challenge-37-anything-goes/


Thanks for reading
Stefanie xx


Thursday, 12 June 2014

Smeared and Smudged Members Blog-Hop

I found a great online group for swaps and challenges for Alternative, Vintage and Gothic rubber stamping recently and joined up.  Today is one of their regular member's blog-hops and I decided to get involved and join in!  The group is Smeared and Smudged - definitely worth a look!!

If you're following the hop I'll be the last stop, but if you've come to me first then the list of my fellow hoppers is below:

Black Dragon
Susan
Leslierahye
Anna
Titbelsoeur
Erin
Teresa
Shoni
Dominike
Evil Edna
The Nanny
and Me!

The theme for this hop is to alter a found object - it had to be 3D and have some stamping.  Well I love altering things!! (Had you guessed?)  I wanted to do something that little bit different so I decided that I would alter an empty underarm deodorant - definitely different eh!?  I also used 2 pieces of black corrugated plastic that came as packaging and a dense foam sheet as shown below.


So, what was I going to do with the deodorant?  Well I decided it looked a little like a rocket ship (!) so I covered it with silver-grey aluminium tape, then added a rusted bottle cap, the legs which are actually cut using the Tim Holtz Pediments die and then folded in half and painted a rusty colour and a couple of extra bands of tape - also rusted up, and then stood it all on an upturned drainage cap from a small plant pot.


Then I stamped my steampunk adventurer and a sentiment with goggles and coloured using my promarkers.


I constructed an explorer's room by covering the black plastic with some blue paper covered with compasses, and two little pictures hanging from thread.  The floor is the foam sheet which I've inked grey with touches of rusty paint.  Altogether it looks like this:


I'm pretty pleased with it as it all came together at the last minute!  Hope you like it too?

I am also wanting to enter this into the following challenges:

Smeared and Smudged's own Junk Funk Challenge - free choice of junk - here http://smearedandsmudged.ning.com/group/thechallenger/forum/topics/junk-funk-challenge-june-2014 (although you may need to be a member to see this - so - join!!)

SanDee and Amelie's Steampunk Challenges - June - shades of grey, blue and rust - here http://sandee-and-amelie.blogspot.co.at/2014/06/shades-of-grey-blue-and-rust-june.html

Altered Eclectic's altered art challenge blog - June - Anything Goes - here http://alteredeclectics.blogspot.co.uk/2014/06/new-month-new-challenge.html

and

Rhedd's Creative Spirit - June altered art - here http://rheddscreativespirit.blogspot.co.uk/2014/06/june-challenge.html


Thanks for reading
Stefanie x


Tuesday, 8 April 2014

tick~tock goes the clock

This is my latest make, a little plaque for my brother-in-law's 50th birthday.


I think it's always difficult deciding how to give something a masculine twist, however Steampunk has made it  a lot easier and as that is a theme I love, I have quite a few cogs, springs and clock-faces lying about!

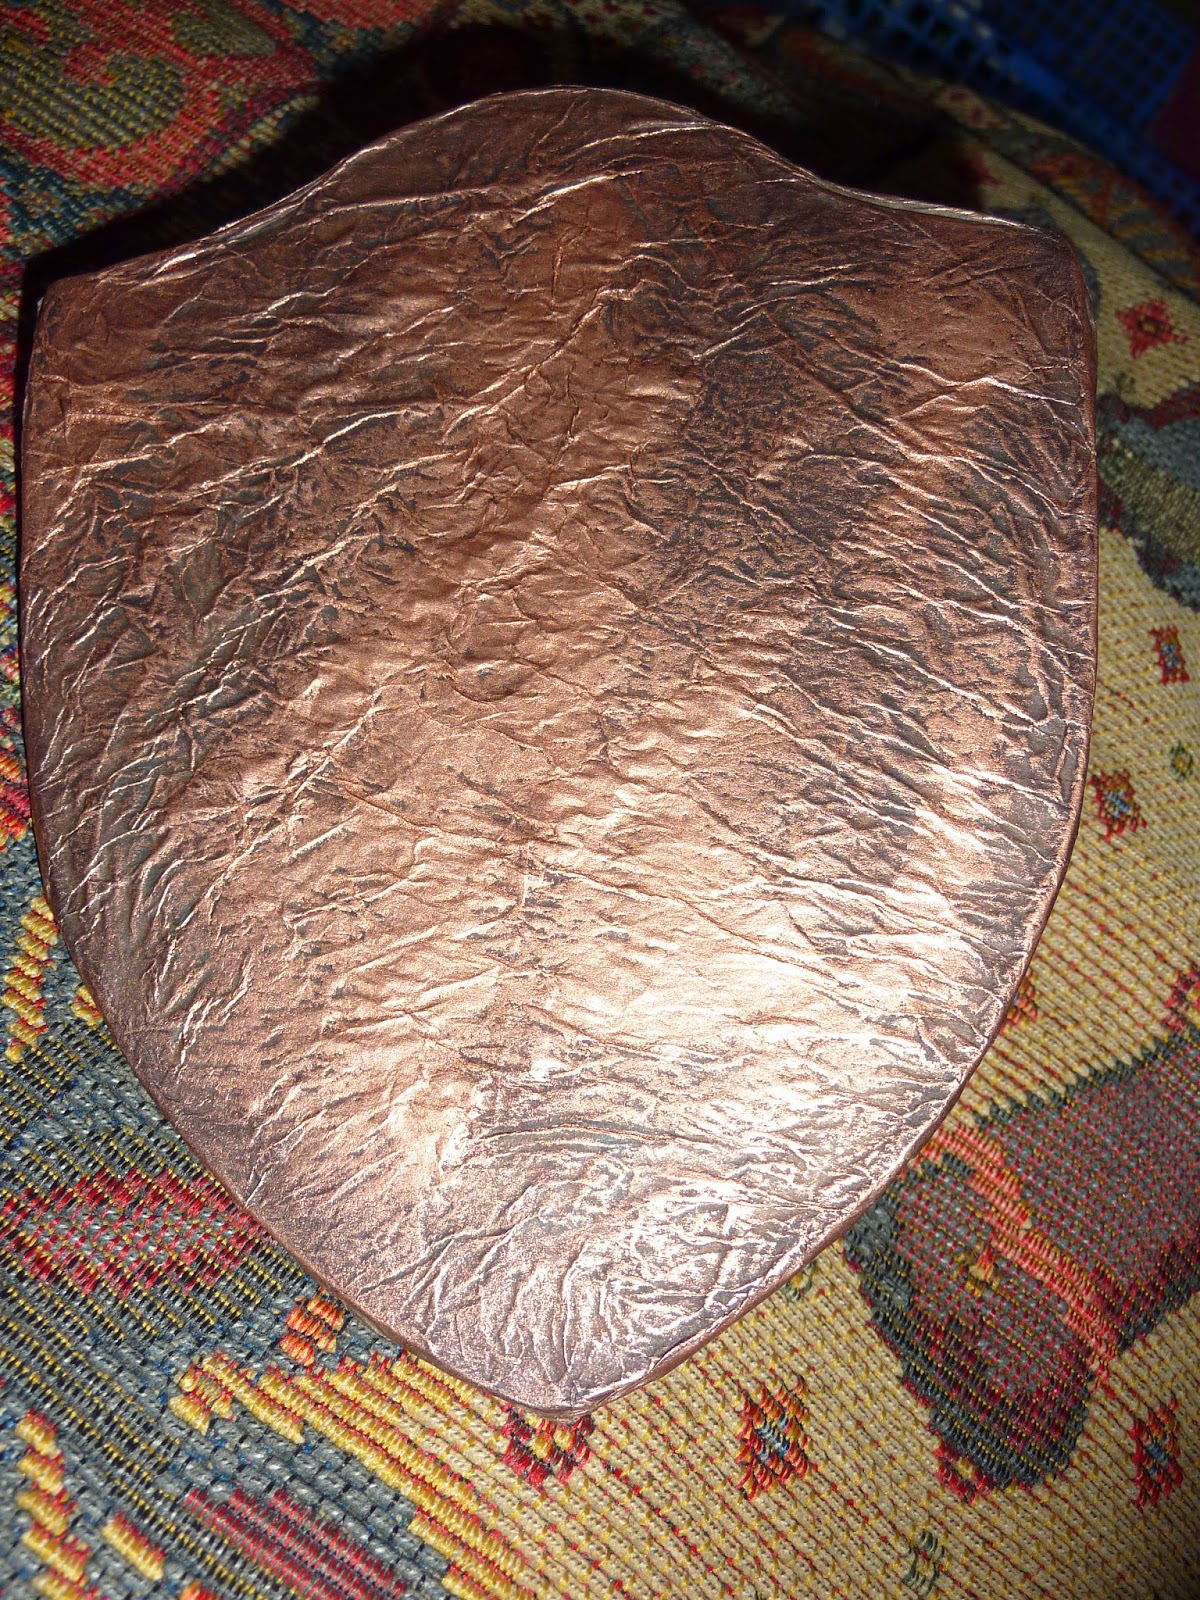
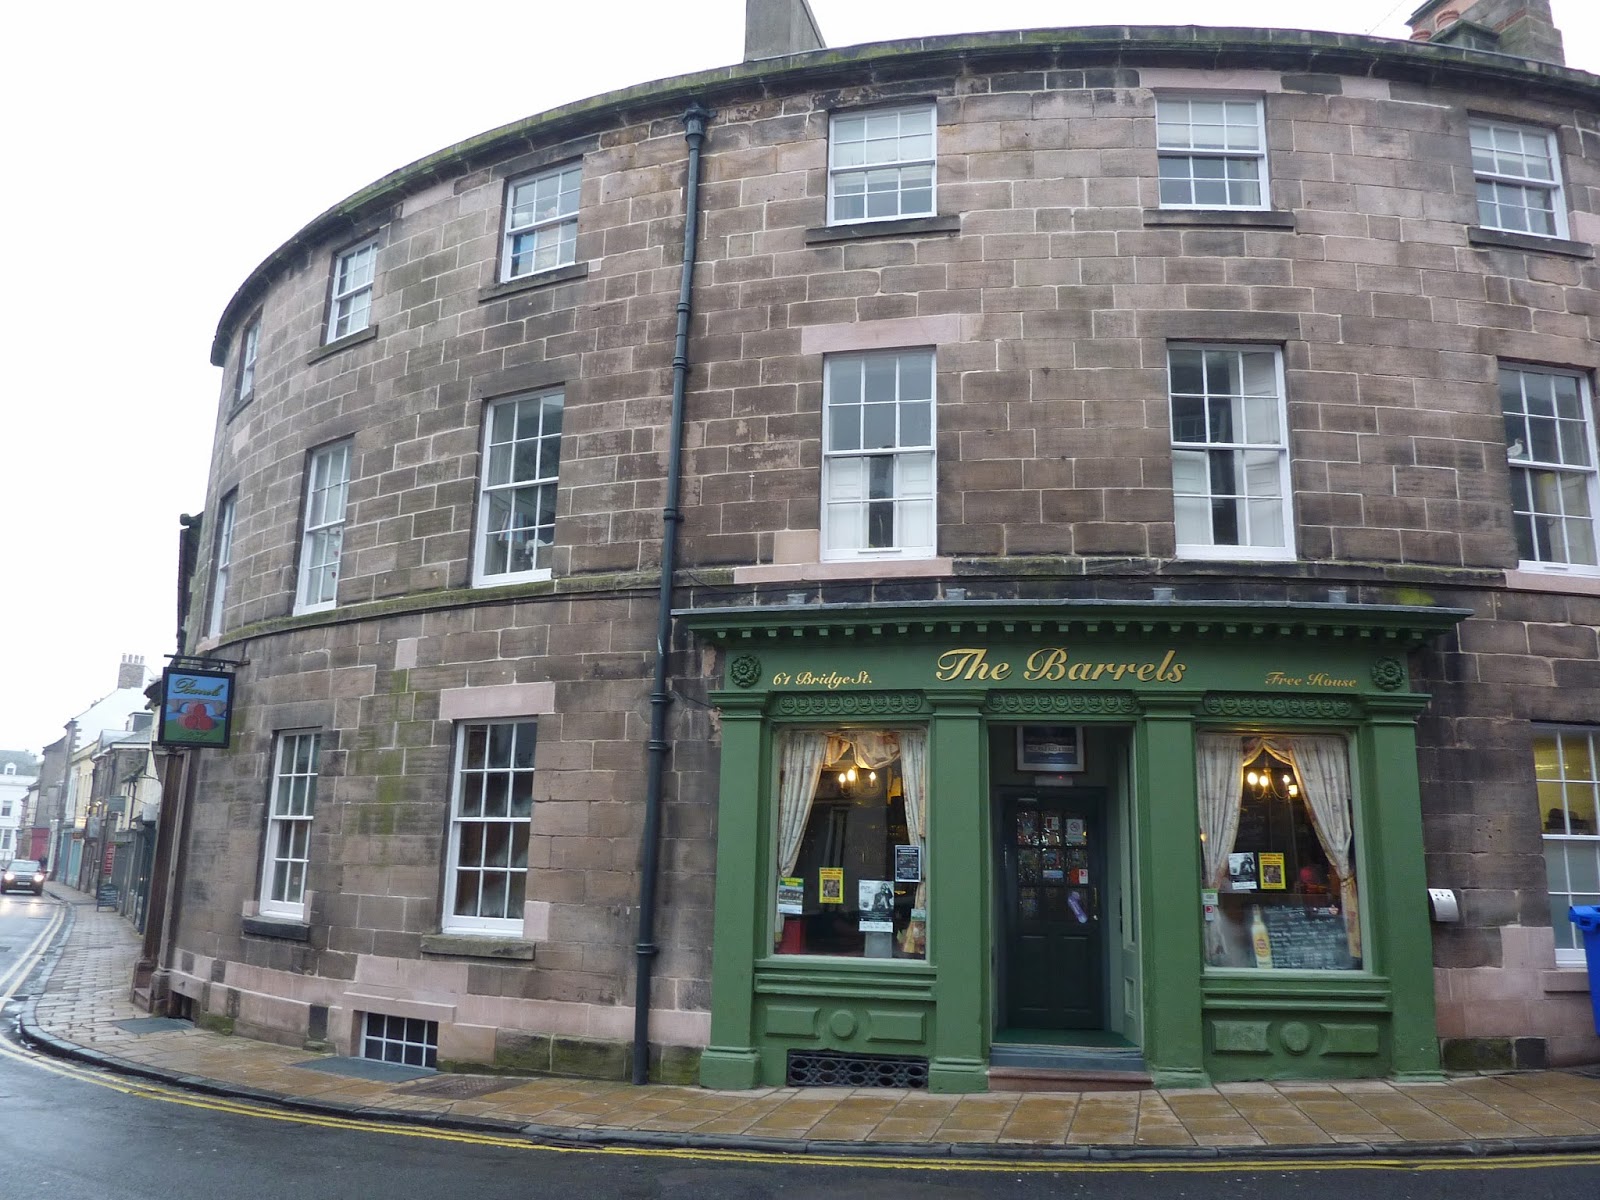
This is made in two parts, the first is a paper mache plaque, and the second is a re-purposed beer pump clip!  I was lucky enough to snare quite a few of these just last week.  Phil and I had managed to escape for a few days and being real-ale lovers and members of CAMRA we looked up a few pubs.  One that I had especially wanted to visit was The Three Barrels in Berwick on Tweed, it had great write-ups and seemed to boast a great atmosphere - well I'm so pleased we did!  The pub itself is fantastic - definitely worth a visit if you are ever up that way.  The decor is right up my street, very eccentric but it works, it even boasts an old dentist chair!!   Anyway I digress, on one side of the bar was a box of pump clips (these are the plastic labels that attach to the front of a beer pump with the name of the beer on) labelled 'Free to Good Home'!  Obviously I had a good look through, and picked a few I wanted but didn't want to seem greedy.  Phil noticed me drooling (!) and asked the barmaid how many we could take.  All of them if you like, was the reply, as they will just end up in the bin otherwise.  So, they came home with us!


So having decided on a slightly steampunk theme for this, I chose one of the clips that was in a shield shape and covered it with several layers of crumpled brown tissue paper.  Once dry, I rubbed some Rub and Buff in Autumn Gold over the surface, blending it in to the creases then when dry, buffing it with a soft tissue.  Next I took a chocolate coloured ink pad and swooshed this over the top.  It's not easy to photograph the end result, but it came out looking like an aged leather.


The paper mache plaque was made by first sticking various elements on the bare surface, numbers, cogs, stars etc. Then I covered it with a sheet of adhesive metal tape.  This was worked into place, and burnished.  I took a combination of alcohol inks and used these to cover the foil.  The next step was to cover the raised elements with a copper leafing pen.  I used to use this technique all the time, it's great over peel-offs too but haven't for a while.  I think it fits in really well with the theme of this piece so was pleased to give it a go again.


The next step was choosing and attaching the elements to the shield.  I chose a word band from Tim Holtz, some clock faces and a large clock spring.


-


And there you have it!


I am entering this into the following challenges:

Frilly and Funkie Challenge Blog, Time after Time - here : http://frillyandfunkie.blogspot.co.uk/2014/03/time-after-time.html


Artful Times, Heavy Metal - here 

Haunted Design House, Steampunky Junk - here http://haunteddesignhouse.blogspot.co.uk/2014/04/macarbre-monday-186-steampunk-junk.html this fits the theme as the pump clip was destined for the bin!!

and Inspiration Journal, A Few of my Favourite Things - here : http://blog.inspirationemporium.com/?p=2192


Thanks for reading :o)

Edited to add : Wow! I was a winner at Artful Times :oD  and got this great new badge for my blog!!